
Pangolin: Free Open Source Alternative to Cloudflare Tunnels

Cloudflare Tunnels do what they promise. One command, and your local service is accessible from anywhere without touching your router or opening ports. The catch is it's Cloudflare's infrastructure, Cloudflare's terms, and Cloudflare's call if your account gets suspended. Your tunnels go with it.
Pangolin does the same thing on a server you control. Self-hosted, open source, free. I've been running it for a few months and it's taken over from Cloudflare Tunnels for most of my internal tooling.
Here's what setup looks like from start to finish.
Watch our platform overview
Connecting a Domain
Before anything else, you need a domain pointed at your server. Pangolin handles SSL automatically via Let's Encrypt, but it needs a valid domain to do that — so point an A record at your VPS IP before you start the setup.
Once DNS propagates, Pangolin's installation script picks up the domain, provisions the certificate, and configures the reverse proxy. It's a single Docker Compose stack, so there's nothing unusual to configure manually. The install takes a few minutes.
After setup, you access the Pangolin dashboard at your domain on port 3000 (or whatever you configured). First login creates the admin account.
Organization
The first thing Pangolin asks you to create is an organization. This is the top-level container for everything — your tunnels, your users, your access rules.
If you're the only person using this, you can just make one org and forget about it. If you're running this for a team, or want to separate projects, you can create multiple orgs and assign users to each independently.
The org settings also control the base subdomain. If your server runs at example.com, your tunneled services will live at *.example.com by default. You can customize the subdomain per resource, but the org sets the root domain they all share.
Newt Tunnel
Newt is the client-side agent — the equivalent of cloudflared in Cloudflare's setup. You install it on any machine that has services you want to expose, and it maintains an outbound connection to your Pangolin server. No inbound ports required.
To set up a tunnel, you generate a token from the Pangolin dashboard and pass it to the Newt agent. Once Newt connects, it shows up as online in the dashboard and you can start pointing resources at it.
One thing worth noting: Newt uses a WireGuard-based tunnel under the hood, so traffic between your service and the Pangolin server is encrypted end-to-end. That's not always the case with simpler reverse proxy setups.
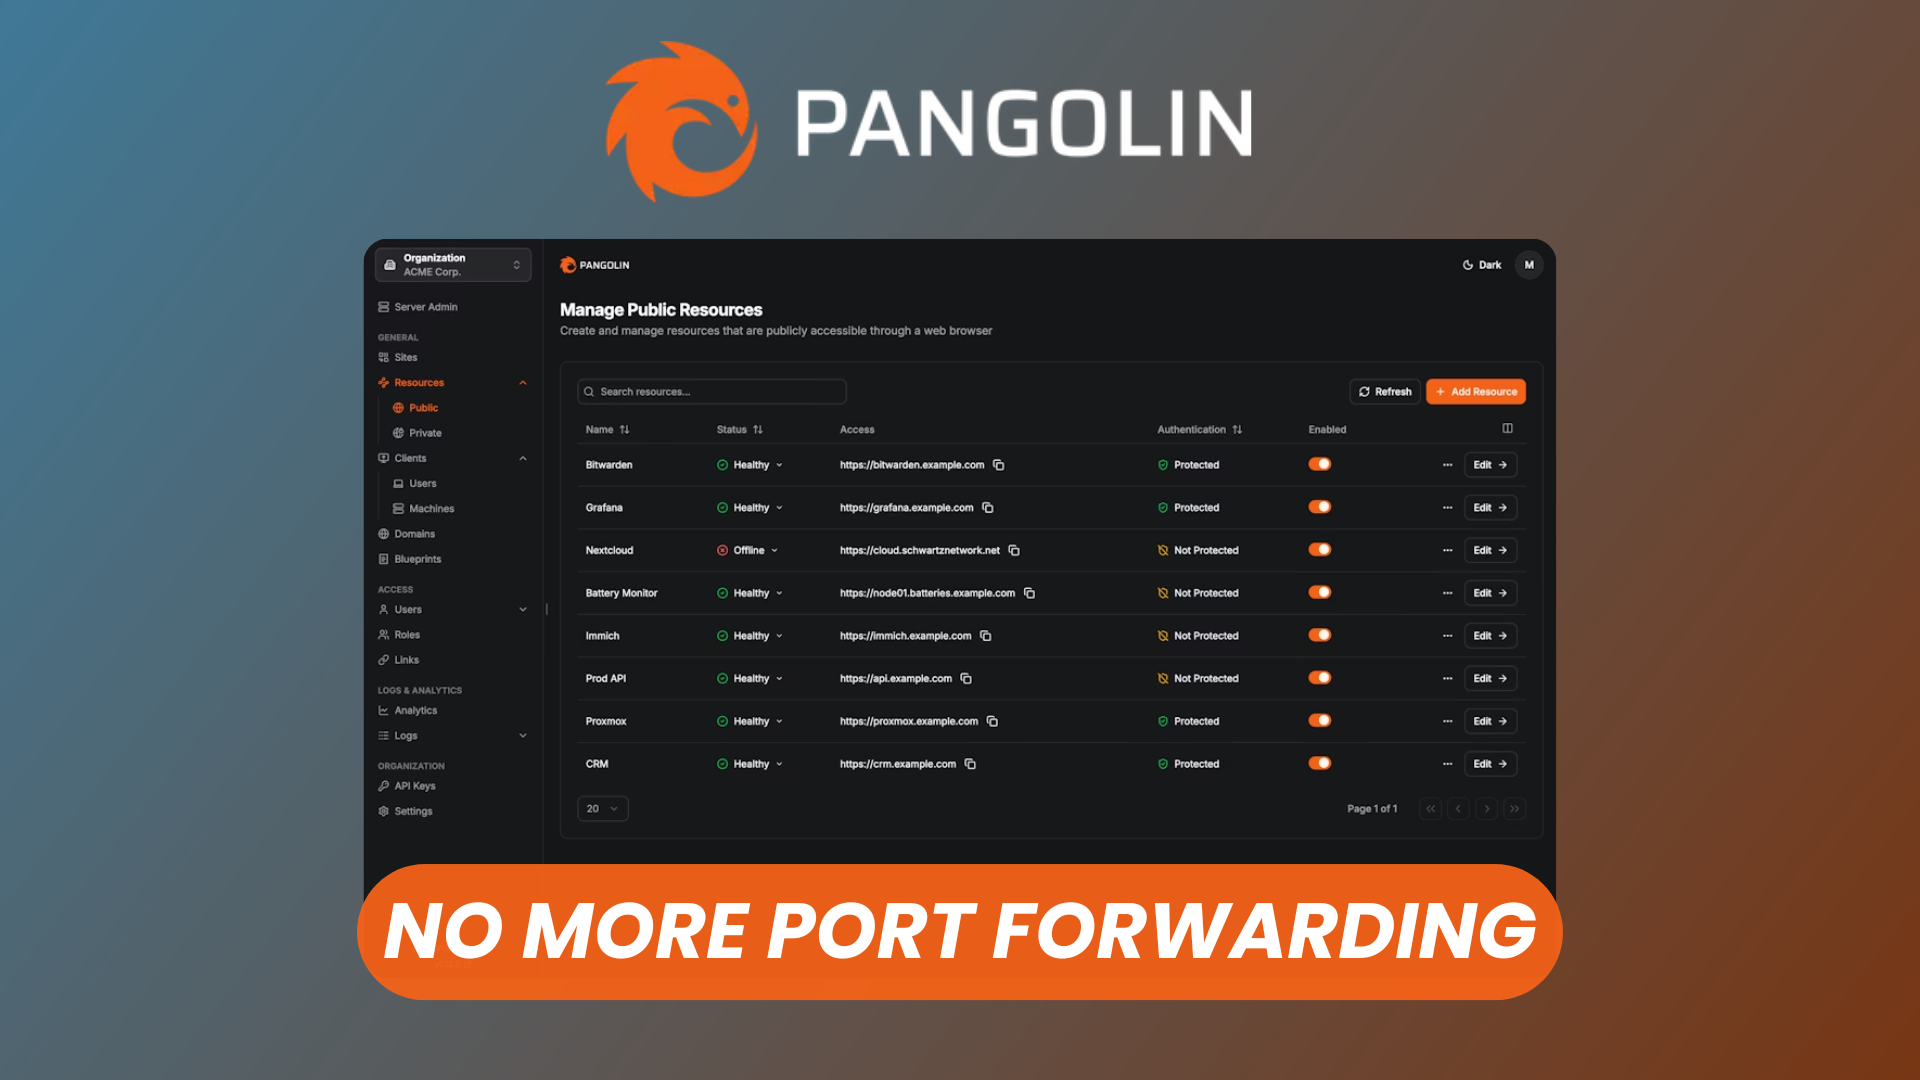
Resources & Targets
Resources are the individual services you expose. Each resource maps a public URL to a local address on the machine running Newt.
Say you have Grafana running on localhost:3000 on your home server. You'd create a resource in Pangolin, set the subdomain to grafana.your-domain.com, and set the target to localhost:3000 via the Newt tunnel you configured. That's it — Pangolin handles the SSL cert and reverse proxy automatically.
You can expose as many resources as you want. HTTP and HTTPS work out of the box. TCP tunnels are also supported for non-HTTP services like databases or SSH, though those work a bit differently from the web resources.
Access control per resource is where Pangolin gets genuinely useful. Each resource can be:
- Public — anyone with the URL can access it
- Protected by login — users need to authenticate through Pangolin's built-in auth
- Restricted to specific users or roles — you decide exactly who can reach it
For internal tools I want to share with collaborators but not expose publicly, the login protection alone is worth the setup.
Users & Roles
User management is what you'd expect. Invite by email, assign to an org, pick a role. The default roles are admin and member, but you can create custom roles with specific permissions.
Where this gets useful: per-resource access control. You can lock a resource to a specific role, so even if someone is in your org, they can only access the services you've explicitly granted them. Useful if you're running Pangolin for a client and want to expose their specific services without giving them access to everything else.
Users authenticate through a login page hosted by Pangolin itself. There's also support for SSO via OIDC if you want to connect it to an existing identity provider like Authentik or Keycloak.
Conclusion
Pangolin isn't a drop-in replacement for every Cloudflare Tunnels use case. If you're already deep in the Cloudflare ecosystem, the migration effort probably isn't worth it just on principle.
But if you're already self-hosting most of your stack, Cloudflare Tunnels can feel like the one piece of infrastructure you don't actually own. Pangolin fixes that. The setup takes an hour the first time. After that, adding tunnels is fast enough that it stops feeling like infrastructure work.
The project is actively maintained and the Docker-based install makes updates painless. If you want to kick the tires, the GitHub repo has a full install script and the docs cover most edge cases.