What is CI/CD Pipeline?-Comparing pipelines!
What is the CI/CD Pipeline?

CI/CD stands for "Continous Integrations & Continuous Delivery or Deployment", this is a standard software practice where the software is handled after development to be able to be deployed on production servers. Then why is it called a pipeline? - So, the short answer is in CI/CD practice the software goes through a chain of different processes logically looking like a pipeline carrying material from one source to the other. The program or the software is supposed to pass through this pipeline to reach the production server; in such case, the software is said to be deploy-ready.
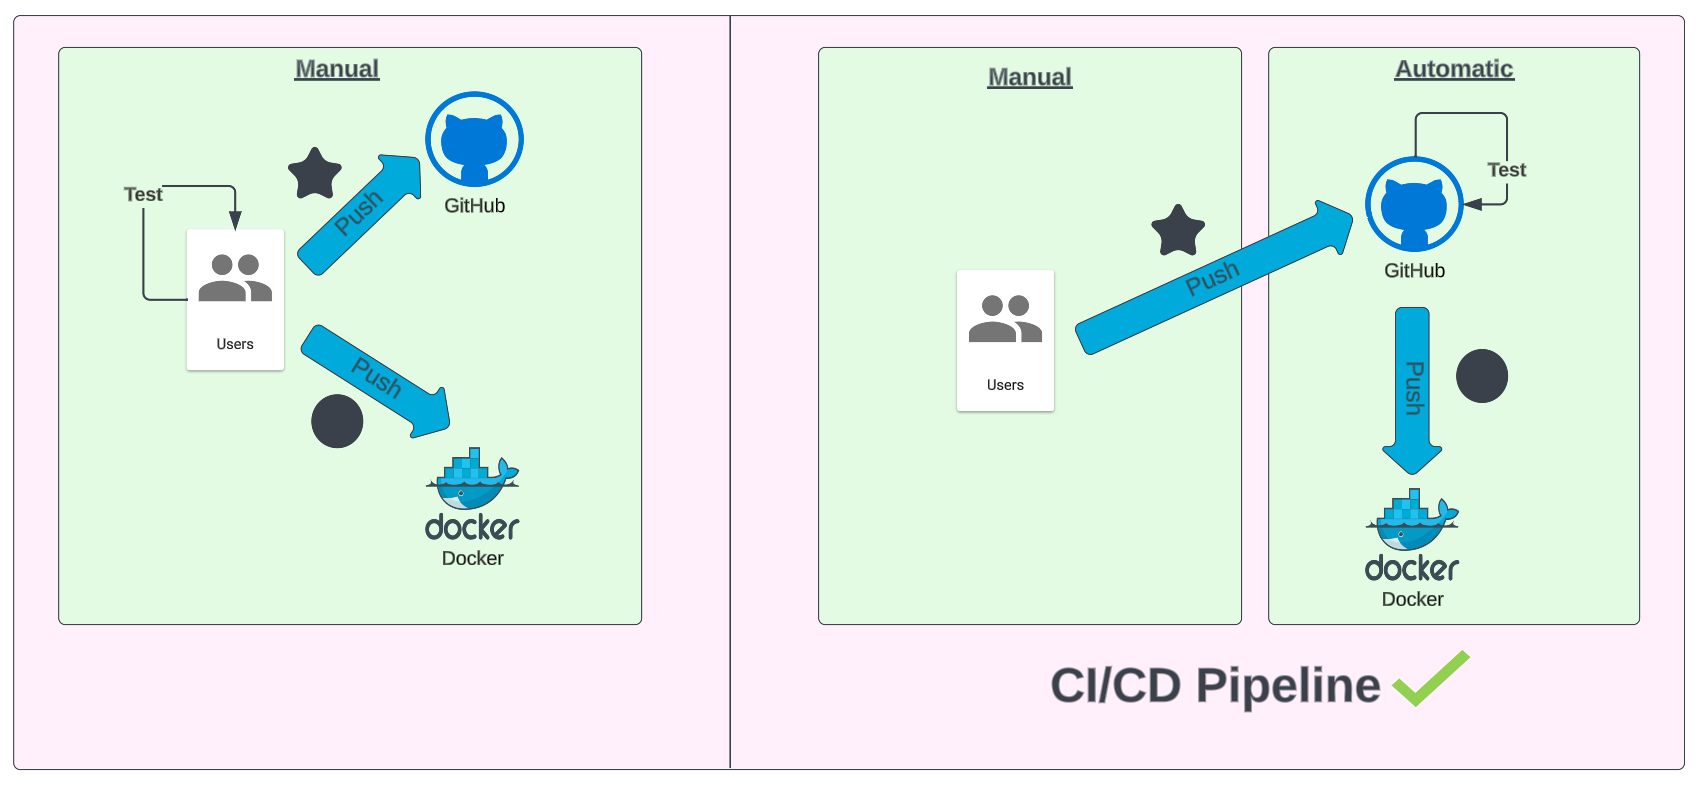
Here, the frequent and important processes for software quality assurance are automated with different methods. We will see some of them going ahead.
So basically once your code is pushed to a code repository ex GitHub all the testing, lintings, builds, pushes, and release generation that happens automatically can be considered as the pipeline. Now let's try out some common CI/CD pipelines
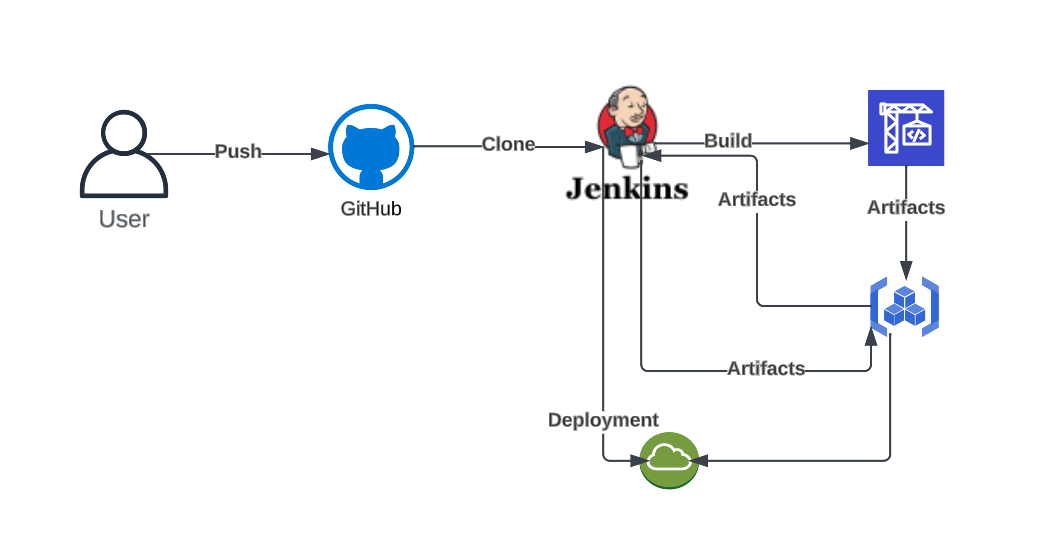
Jenkins
Jenkins, a preeminent open-source CI/CD tool, maintains its status as the preferred solution for professionals. With a robust platform supported by an active community, it offers seamless integration with major version control systems and a comprehensive array of community-backed plugins for Jenkins server customization.
The cost factor aligns with financial prudence—Jenkins is free to use, with expenditures limited to infrastructure-related costs. In the CI/CD landscape, Jenkins stands out as the technically sound and economically viable choice for proficient developers. Time to embark on the coding journey with confidence and precision!
GitLab CI
GitLab CI seamlessly integrates with the broader platform, offering automated build, test, and deployment pipelines. While initially tailored for GitLab-hosted repositories, it extends its reach to GitHub, Bitbucket, and other Git servers. Beyond the hosted build runners, users can leverage their runners at no additional expense.
On the financial front, the free tier includes 400 compute minutes monthly for shared pipelines. Each unit corresponds to a minute of execution time on the most economical runner. For those requiring more, additional units are available for purchase, starting at $10 for 1,000 units. The paid tiers kick in at a reasonable $29 per user per month.

Azure DevOps
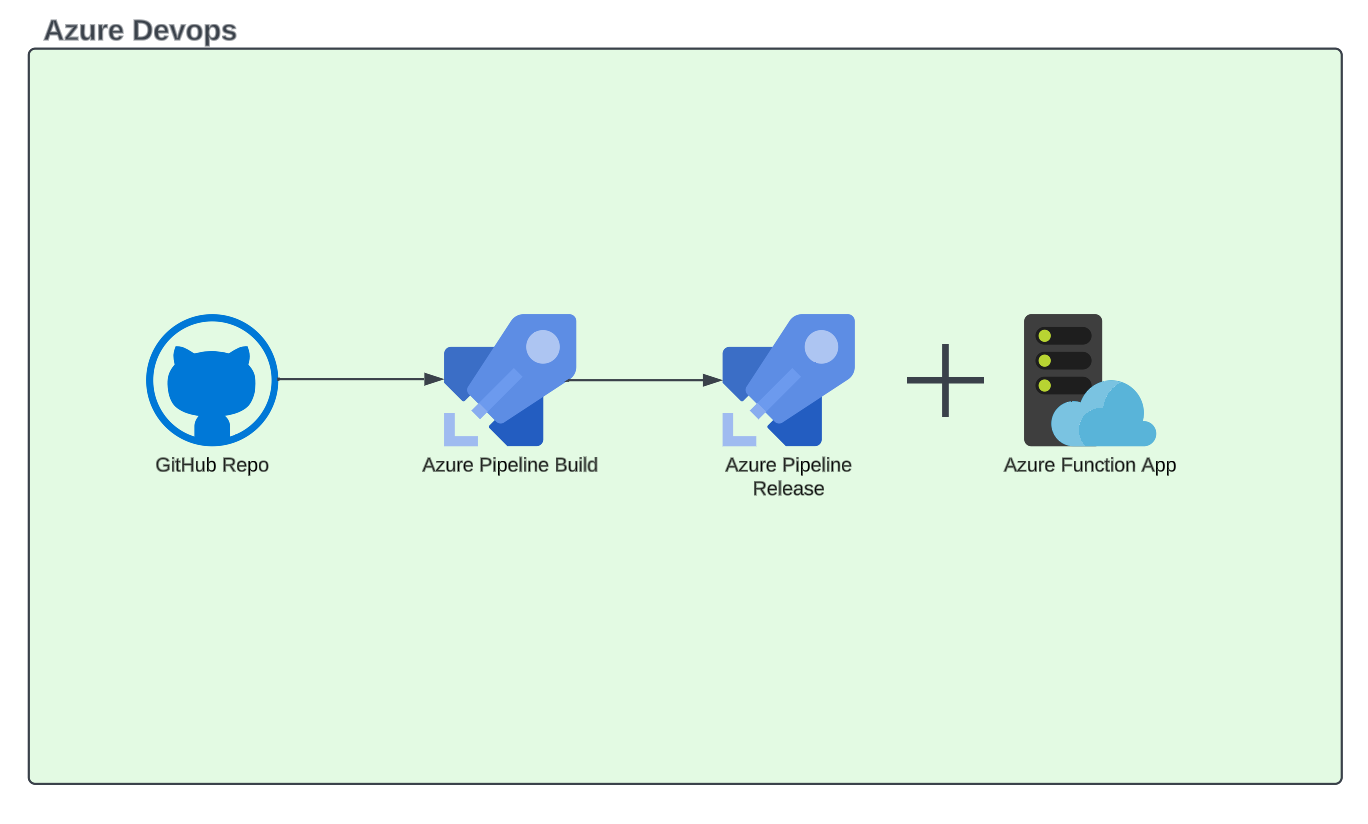
Making strides in the rankings from the previous year is Microsoft's Azure DevOps Pipelines, an integral component of the DevOps suite. This versatile tool supports both cloud-hosted and on-premises build agents, offering seamless integrations for deployments across major cloud computing providers.
In terms of cost, it's a win for open-source projects, as the service is free for such projects with up to 10 parallel build jobs. The basic plan extends its generosity to the first 5 users, remaining free, and then shifts to $6 per user per month with an included free pipeline. If your needs go beyond, additional pipelines for concurrent build jobs are available, starting at $40 per month for the cloud-hosted option or $15 per month for the self-hosted alternative.
Elestio CI/CD Pipelines
Elestio is a platform that provides fully managed services to deploy your open-source projects and CI/CD pipelines that are secure and fast. This is a bit different from the one mentioned above as it tries to help you with the drawbacks you see from the above tools. Be it cost, time or manageability, Elestio has got it covered.
While we are at it, let's just build a CI/CD pipeline on Elestio
- Login to your Elestio account
- Click on the CI/CD option from the left side panel
- Select your source:
- From there click on Github or Gitlab, and you will be asked to provide authorization to list your projects in Elestio.
- Then you will be able to browse Organizations and repositories detected on your account. You can also use the search to find directly your project to deploy. Once you found it, click on Import, then click on Next. Here you have to indicate where the app should be deployed, it can be a "Deploy on new VM", in that case, you can select your preferred provider/region/instance size. Or an existing VM, then you just have to pick it from the list.
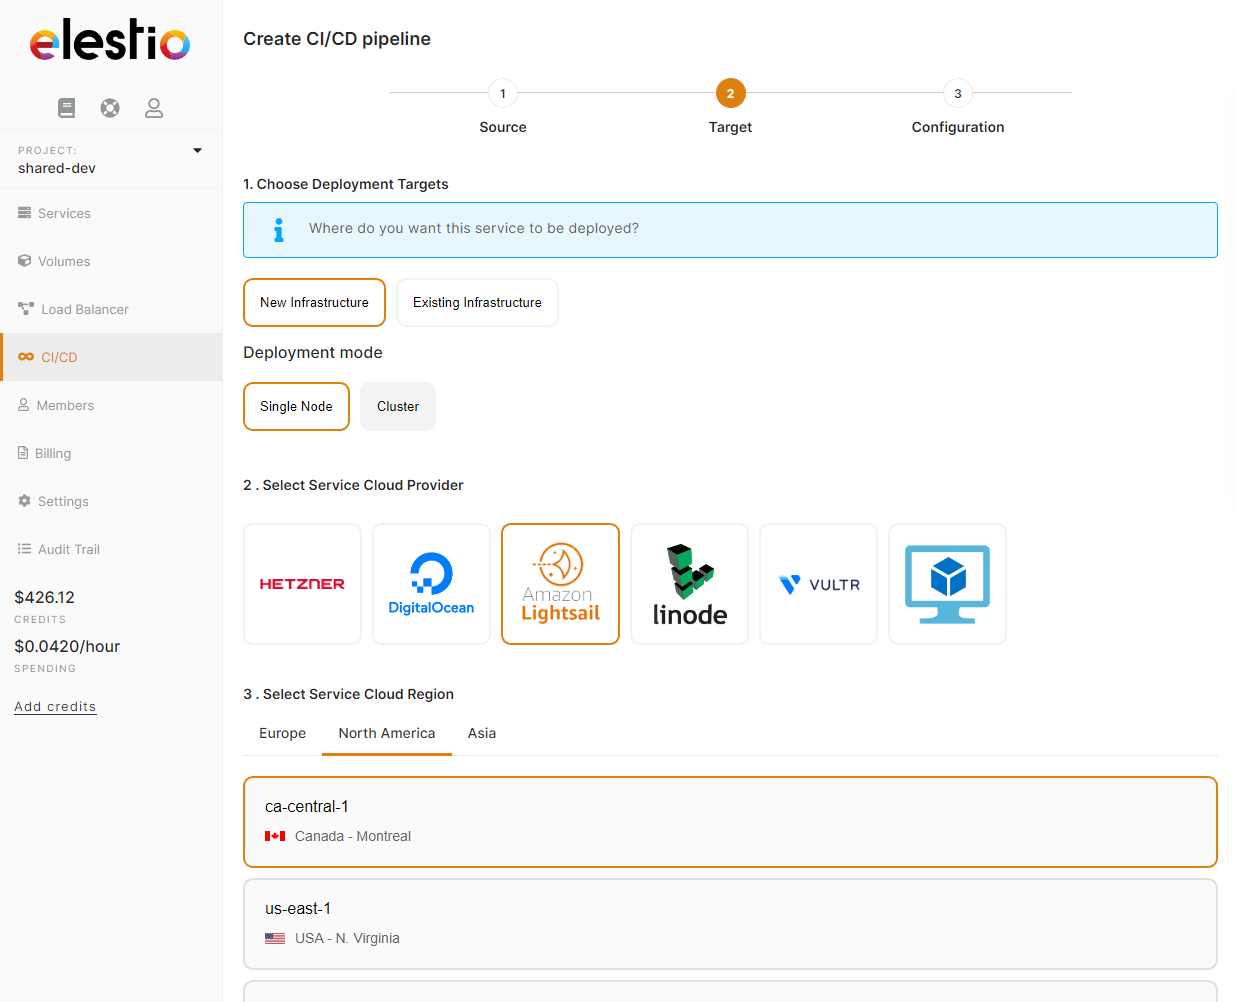
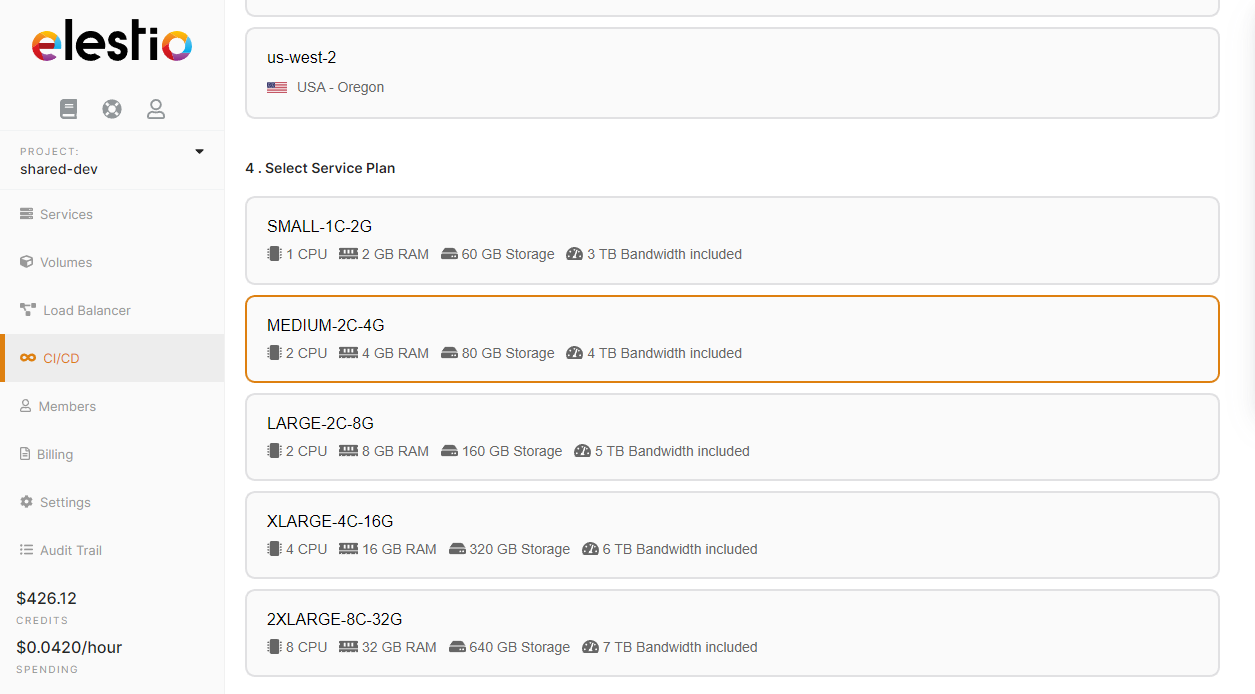
- Select your target:Here you have to indicate where the app should be deployed, it can be a "Deploy on new VM", in that case, you can select your preferred provider/region/instance size. Or an existing infrastructure, then you just have to pick it from the list.


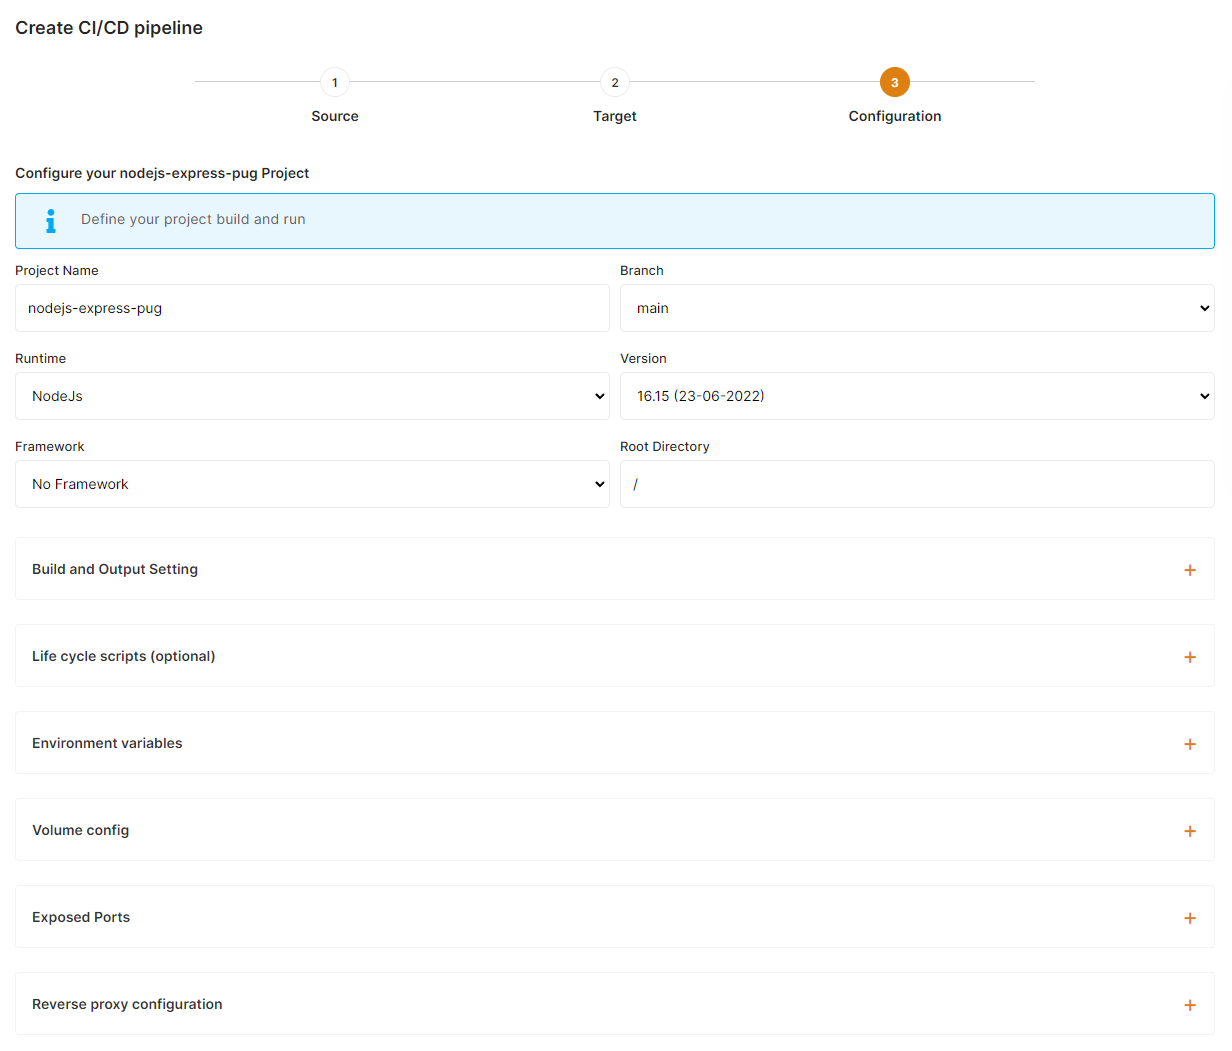
5. Configure your project:This is the last step of the process where you can configure your project name, branch, runtime, and all other settings about your build and environment configuration.
Global settings:
Select the Runtime & version that matches your project needs. If you are using a framework select it in the framework dropdown, this will auto-populate the build/run commands.
Build settings
You can customize the install/build/run command to suit your requirements.

Life cycle scripts
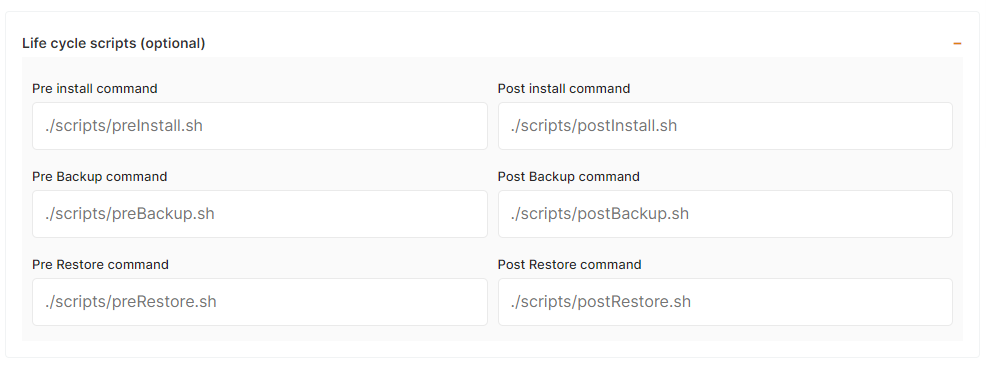
In some situations, you will need to execute scripts before or after the installation of a new pipeline to set up your env, install some dependencies, and copy the dataset, ... In those cases, you can define pre/post scripts to execute before/after an installation and other actions like backup/restore. To activate it just indicate your script path relative to the root folder of your git repository.
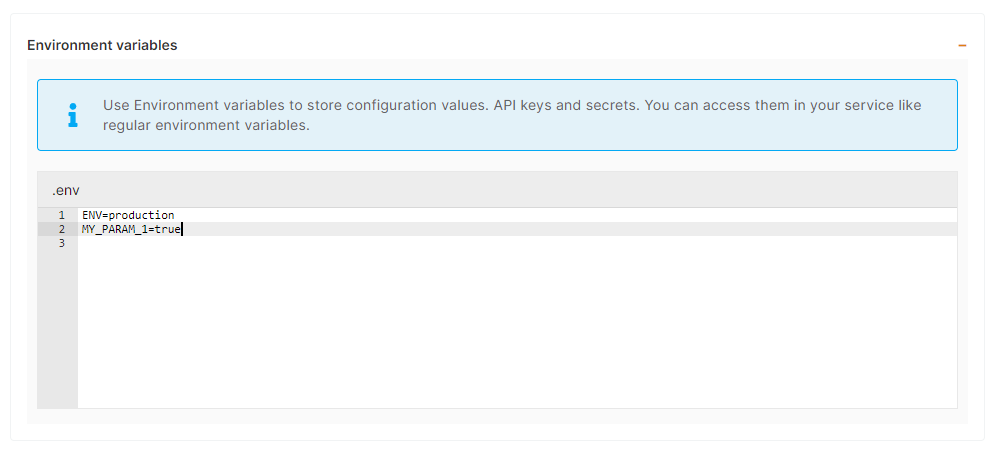
Environment variables
In most cases, you will have to indicate the configuration for your app through env vars. This is useful to pass various configurations to your app like database connection string, S3 bucket details, email address to use, and other global configurations.
Volumes (data storage)
A lot of apps are stateless and don't require any volumes, but some of them need persistent storage to store file uploads, config, logs and other files. You can define one or multiple volumes as folders from the host (CI/CD target instance) mounted into the container. That way the files are persisted and available to the container.
The path of the host should start with ./

Exposed ports
If your app is listening on port 3000, you should indicate Container port to 3000, then the Host port can be the same or anything else. If your app is listening on multiple ports you can add them as additional rows by clicking on "Add another"
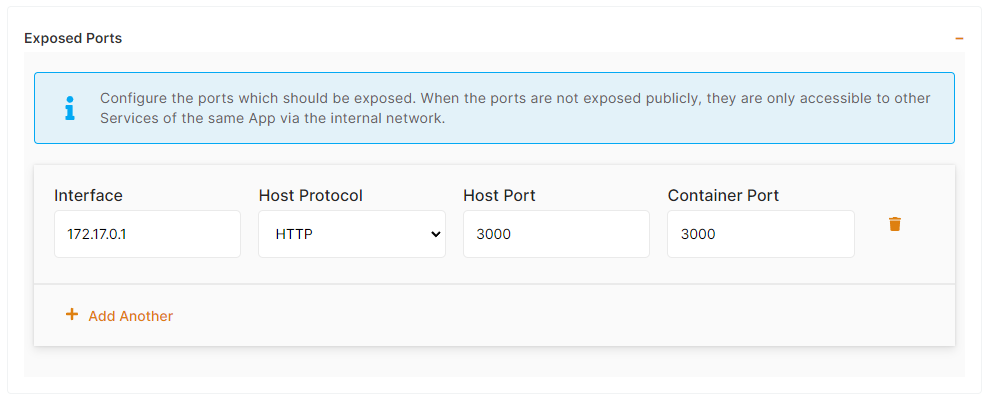
If you need to deploy several instances of the same app on a single node you will have to change the host port in the exposed ports > host port and also in reverse proxy > target port accordingly.
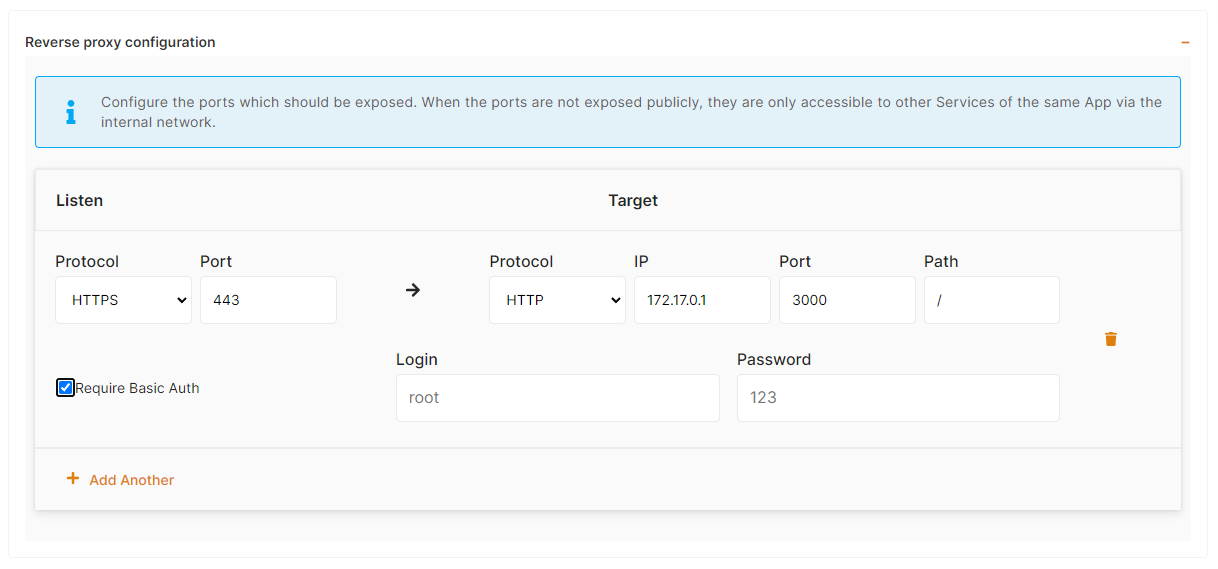
Reverse proxy
Finally to make your app accessible on the internet, indicate in the target port the same thing you have configured on the host port in the previous step, so here is port 3000.It's possible to activate Basic Authentication if you check the corresponding checkbox and define login and password
- Finally, click on "Create CI/CD pipeline" to complete your deployment.
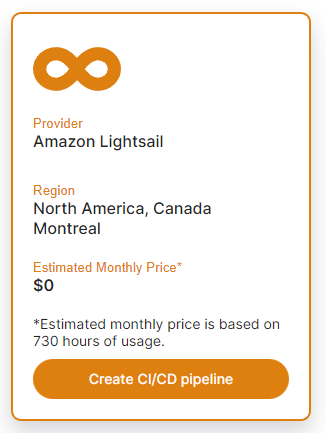
After a few minutes, your app should be accessible on the CI/CD pipeline URL, you can find it in the dashboard overview of your pipeline. Also, each time you commit to your repo, code will be rebuilt & re-deployed.
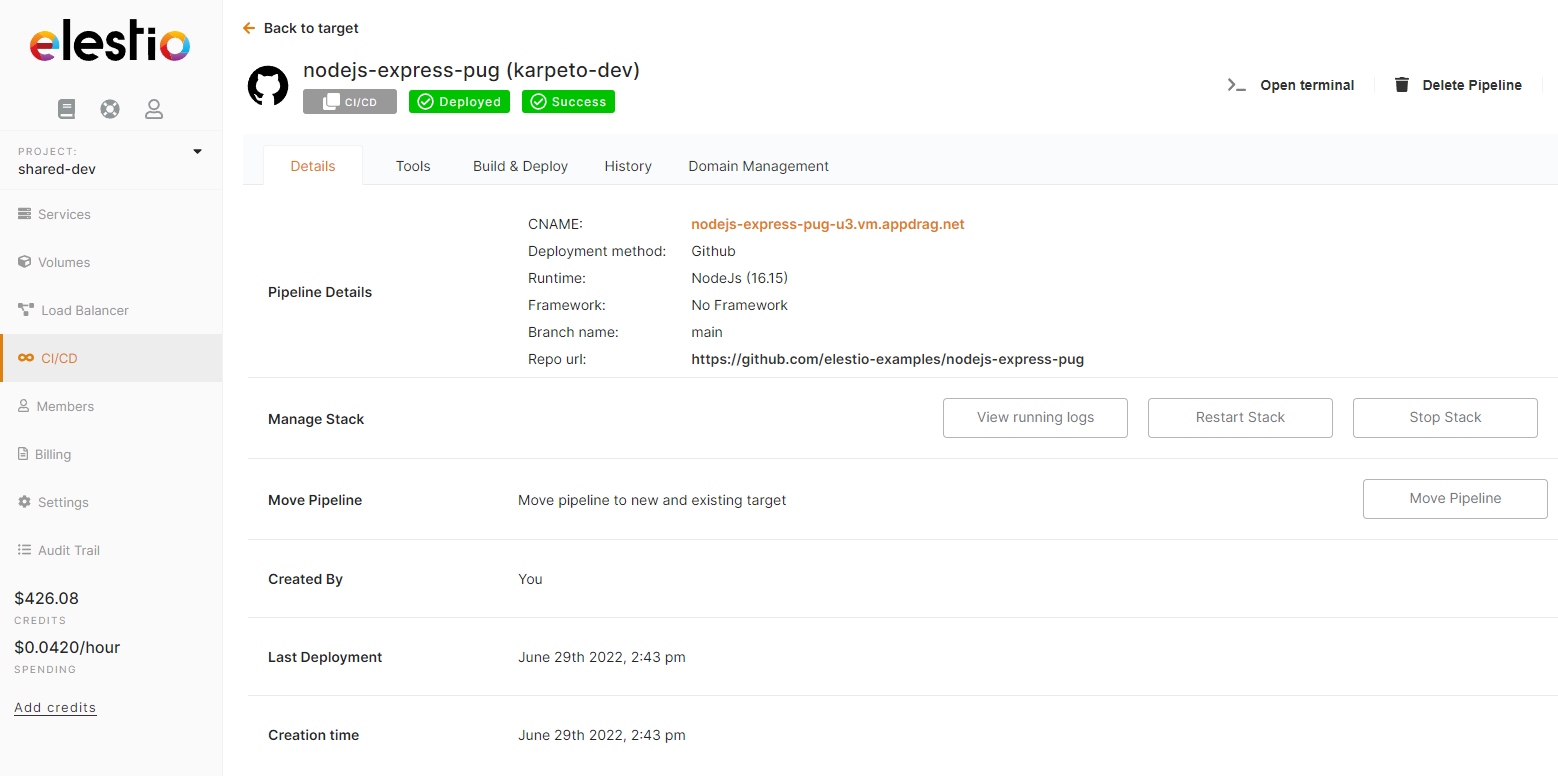
And done 🥳 you have successfully created your first CI/CD pipeline with Elestio.
Additionally, Elestio has amazing step-by-step tutorials you can follow to create your first CI/CD pipeline, take a look 👇:
https://docs.elest.io/books/cicd-pipelines
https://docs.elest.io/books/cicd-pipelines/page/deploy-your-first-cicd-pipeline-on-elestio
Thanks for reading ❤️
If you like the blog, then do try out creating your pipelines and if you want to support us then you can add the "Deploy on Elest.io" button to your open source project. Well, that's it for this blog, we will catch up with you in the next one 👋

